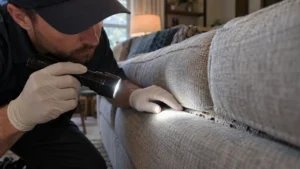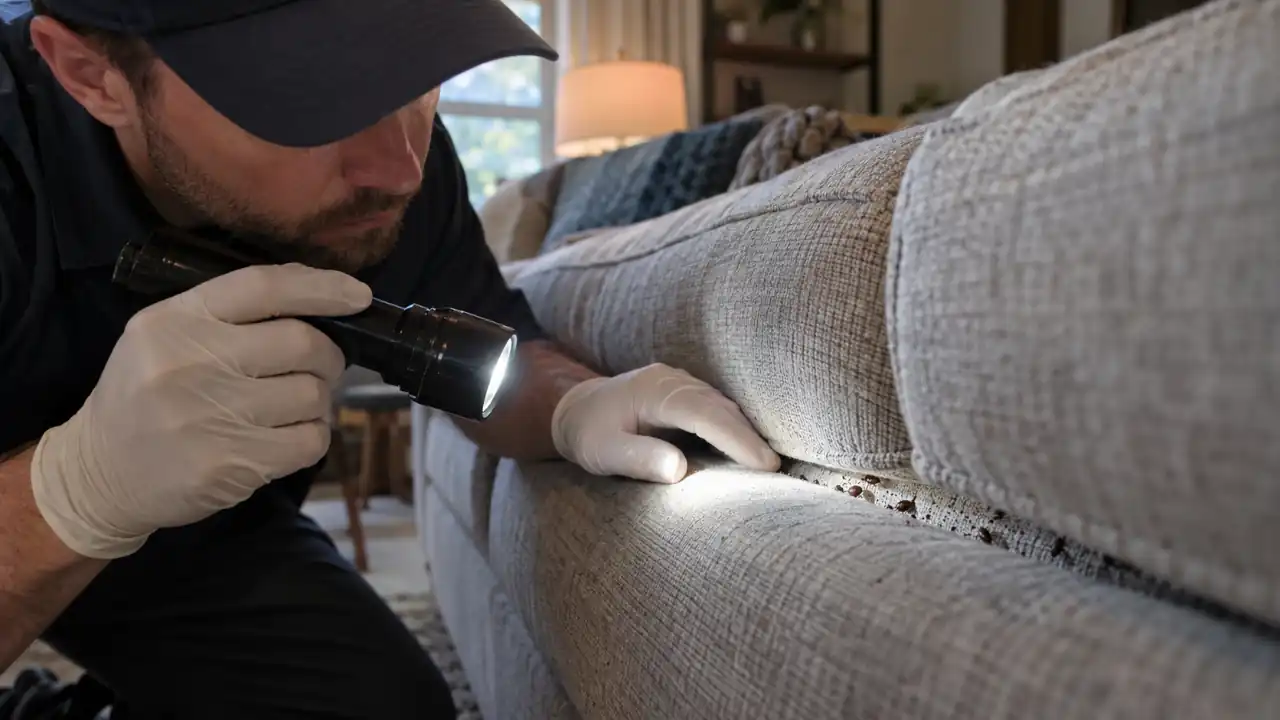
If you woke up with itchy red bumps you can’t explain, or you spotted something that looked like a tiny rust-colored speck on your sheets, your stomach probably dropped a little. I get it. After eighteen years of crawling around mattresses, box springs, and baseboards for a living, I can tell you that the panic is normal, but the good news is that a careful inspection can uncover useful evidence, even when you don’t see a live bug right away. The trick is knowing where to look and which signs actually matter.
Most homeowners only check the mattress and call it a day. That’s a mistake, because bed bugs can hide in the box spring, bed frame, headboard, nearby furniture, and other cracks and crevices close to where people sleep. An infestation doesn’t always spread to multiple hiding spots immediately, but the longer it goes undetected, the more opportunities the bugs have to establish themselves elsewhere. This guide walks you through the same basic inspection approach I use on real jobs, including how to find bed bugs when they’re hiding in places most homeowners don’t think to check.
Also Read: Bed Bug Treatment Cost: Full Price Breakdown for 2026
Quick Answer: How To Check For Bed Bugs?
Start by inspecting the mattress and box spring, then check the bed frame, headboard, nearby furniture, upholstered furniture, and room perimeter. Look for live bugs, fecal spots, shed skins, eggs, and blood stains. If visual inspection is inconclusive, bed bug interceptors can help monitor activity.
1. Gather Your Inspection Tools
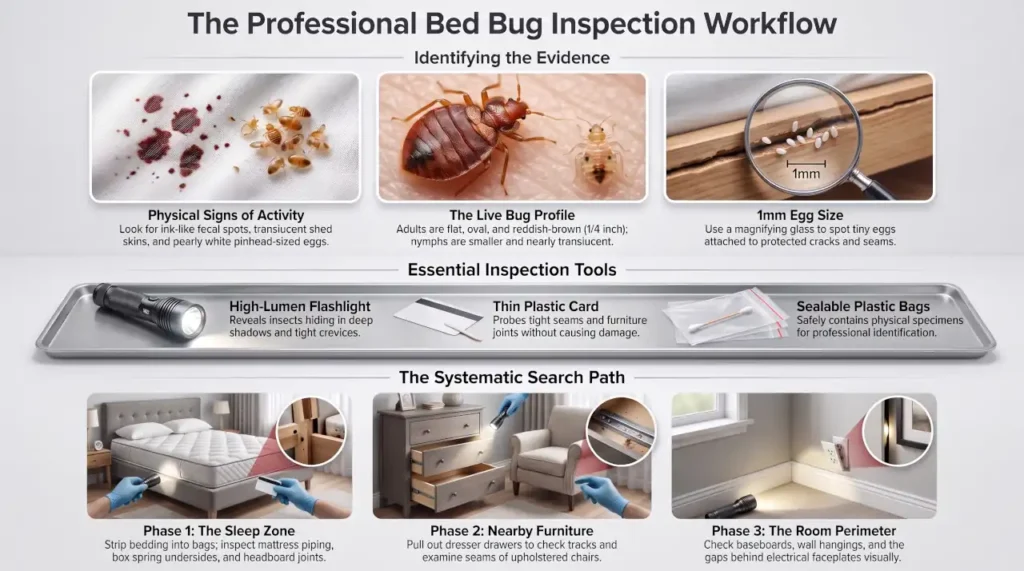
Before you start pulling apart your bedroom, take two minutes to grab a few things. You don’t need anything fancy or expensive. A bright flashlight is the single most important tool in this whole process, because bed bugs are experts at hiding in shadows, and a dim overhead light just won’t cut it. Get one with a strong, focused beam, not the soft glow from your phone.
A magnifying glass helps a lot too, especially if your eyesight isn’t what it used to be or you’re checking for eggs, which are about the size of a pinhead and pale enough to blend into fabric. A credit card or any flat, stiff, thin object is your third tool, and it’s more useful than people expect. Bed bugs can wedge themselves into seams, cracks, and joints that are too tight to inspect with your fingers. A thin, stiff card can help you gently probe accessible gaps and seams without damaging the material. Don’t force it into tight openings or pry apart furniture that could be damaged.
You’ll also want a few plastic bags or small containers on hand. If you do find something, whether it’s a live bug, a shed skin, or a cluster of eggs, you want to be able to seal it up right away. This helps contain anything alive you collect and gives you or a pest control professional a physical sample that can be used for identification. Trust me, having actual evidence in a bag speeds up the whole process if you end up calling in a professional.
Finally, put on a pair of disposable gloves. Bed bugs themselves aren’t known to spread disease, but you’re going to be touching old dust, dried stains, and debris in tight, dirty corners, and gloves just make the whole job less unpleasant. Once you’ve got these five things together, you’re ready to start looking with a plan instead of just poking around randomly.
2. Know What You’re Looking For
Here’s where most people trip up. They picture a bed bug as this obvious, crawling black bug, and when they don’t see one wandering around in broad daylight, they assume they’re in the clear. That’s not how it works. Bed bugs are nocturnal and hide during the day, so knowing where bed bugs hide is critical during an inspection. They typically stay in cracks, seams, folds, and other protected spaces close to where people sleep or rest. What you’re actually hunting for most of the time is evidence, not the bug itself.
Live bed bugs are flat, oval, reddish-brown insects about ¼ inch long when fully grown, while younger nymphs are much smaller, lighter, and sometimes nearly translucent. After they feed, their bodies swell up and turn a darker, more purplish red. Younger bed bugs, called nymphs, are smaller and much lighter in color, sometimes almost translucent, which makes them incredibly easy to miss against light-colored sheets.
If you’re dealing with very small bugs, it can be surprisingly difficult to tell whether you’re looking at a young bed bug or something else. A closer look at baby bed bugs can make identification much easier.
Bed bug eggs are tiny—about 1 millimeter long—pearly white and difficult to see individually. They may be found attached to surfaces in protected cracks and crevices, including around mattress seams, furniture joints, and other hiding places. If you’re not sure whether a tiny pale speck is an egg, don’t assume it is. Photograph it and, if possible, preserve a sample for identification.
Shed skins can be useful evidence, particularly when you find several in an area where bed bugs could be hiding. On their own, though, they don’t tell you exactly how large or how old an infestation is. Look for multiple pieces of physical evidence rather than relying on one finding; a properly identified live bed bug, eggs, shed skins, or characteristic fecal spotting is more useful for confirmation than bites or odor alone. If you find several signs concentrated in one area, pay close attention to the cracks, seams, and other hiding places nearby.
When you’re trying to confirm whether a suspicious insect is actually a bed bug, proper identification matters more than bite patterns, since carpet beetles, fleas, cockroach nymphs, and other insects can be mistaken for bed bugs. The U.S. Environmental Protection Agency’s bed bug guidance recommends looking for physical evidence and using proper identification rather than relying solely on bites or other symptoms.
Fecal spots are another giveaway. These show up as small, dark, almost black dots that look like they were made with a fine-tip marker, and they tend to bleed slightly into fabric the way ink does. You’ll usually find them along mattress seams, on box springs, or on the wall right behind the headboard.
Blood stains are a bit different, appearing as small reddish or brownish smears, while fecal spots are typically darker, ink-like marks that may bleed into fabric. And then there’s the smell. A noticeable musty or sweet odor can occur with heavier infestations, but odor is not a dependable way to diagnose bed bugs. If your room smells unusual, treat that as a reason to inspect more closely—not as proof that bed bugs are present.
3. Inspect Your Mattress and Box Spring
Before moving bedding, clothing, or other belongings between rooms, keep potentially infested items contained. Avoid carrying loose bedding or clothing through the house, and don’t move furniture from one room to another simply to inspect it. The goal is to inspect systematically without giving bed bugs additional opportunities to spread.
This is the obvious starting point, and for good reason. It’s one of the most important areas to inspect because it’s close to where you sleep and provides plenty of seams, folds, and protected spaces where bed bugs can hide. Strip the bed completely, including sheets, pillowcases, and removable bedding.
Place the items directly into sealed bags or containers rather than carrying loose bedding through the house. Launder and dry them according to the care label, using the hottest dryer setting the material can safely tolerate when appropriate. A bed bug mattress encasement can also simplify future inspections and limit hiding places inside the mattress, but it does not address bugs hiding elsewhere in the room. A bed bug mattress encasement can also simplify future inspections and limit hiding places inside the mattress, but it does not address bugs hiding elsewhere in the room.
With your flashlight in hand, run the beam slowly along every seam of the mattress. Pay extra attention to the piping around the edges, the tag, and any folds or creases in the fabric. These seams are common places to find bed bugs or their eggs because they provide protected spaces close to where people sleep. Use your credit card to gently pry open any tight seams so you can see what’s tucked inside.
Don’t stop at the mattress. Flip it up and check the box spring just as thoroughly, including the underside, which is often overlooked because it requires actually lifting the whole thing. Box springs have fabric dust covers on the bottom, and bed bugs love to get up underneath that cover where it’s dark and undisturbed. If you can safely peel back a corner of that fabric without destroying it, do it.
This is an especially productive area to inspect, and it’s one homeowners often skip because it takes a bit of effort.
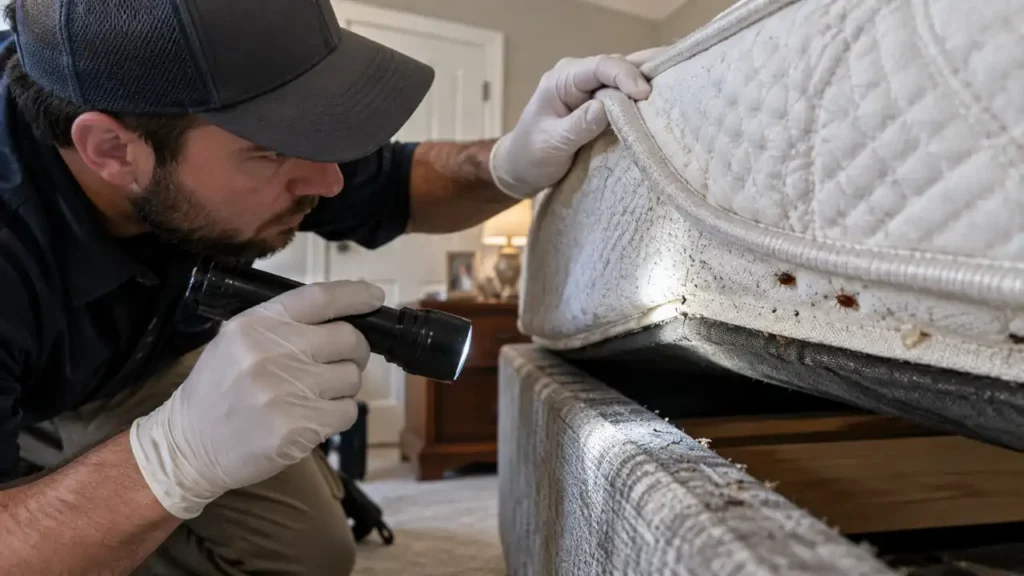
A field tip: Don’t inspect every inch of the mattress with equal intensity. Spend extra time on areas closest to where a person sleeps and on protected seams, folds, tags, handles, and joints. You’re looking for places where a bug could stay hidden during the day while remaining close enough to feed at night. A slow, targeted inspection is usually more productive than simply shining a flashlight over the entire mattress.
4. Examine the Bed Frame and Headboard
Once you’re done with the mattress and box spring, move to the frame itself. Bed bugs don’t need soft fabric to hide, they’re just as happy wedged into a wooden joint, a screw hole, or the crack where two frame pieces meet. Run your flashlight along every joint, corner, and crevice of the frame, and use your credit card to check any gaps that are too narrow to see into clearly.
The headboard deserves special attention, especially if it’s mounted against the wall or has any kind of padded or upholstered surface. Bed bugs often hide in the small gap between the headboard and the wall, since it’s dark, rarely disturbed, and right next to where you sleep for hours every night. If your headboard has decorative buttons, tufting, or fabric folds, check every single one of those pockets individually. It’s tedious, but it’s exactly the kind of spot that lets an infestation quietly grow for weeks before anyone notices.
5. Search Nearby Furniture
Bed bugs don’t stay confined to the bed once a population starts to grow, and they can spread to nearby sleeping or resting areas such as nightstands, dressers, chairs, and couches. They spread outward to anything within a few feet, which usually means nightstands, dressers, and any chairs or benches near the bed. Pull nightstands and dressers away from the wall and check both the front and back panels, along with the underside of each drawer.
Take every drawer all the way out if you can. Bed bugs love the wood joints and corners inside drawer tracks because they’re tight, dark, and almost never cleaned or disturbed. Check the drawer glides and the exposed frame of the furniture itself, not just the inside of the drawers. If you have a shared closet or a small side table near the bed, give those the same treatment.
As a practical rule, inspect furniture and belongings close to the bed first, then expand the search if you find evidence or signs that the infestation has spread. Don’t treat a fixed distance such as fifteen feet as a hard boundary—bed bugs can turn up farther away when an infestation becomes established.
6. Check Upholstered Furniture
Any fabric-covered furniture in the bedroom, or honestly anywhere in the house, is a potential hiding spot, and this includes couches, armchairs, ottomans, and even fabric-covered benches at the foot of the bed. Start by removing any cushions and checking underneath them, along the zippers, and in the seams where the fabric is stitched together.
Flip the furniture over if you’re able to and check the underside, including the dust cover fabric stapled to the frame, the same way you checked the box spring. Bed bugs also like to tuck themselves into the folds where the arm meets the seat cushion, and along the back panel where the fabric is loose enough to create a small pocket.
If the piece has wooden legs, check where the leg meets the frame too, since that joint is another classic hiding spot. This step matters more than people think, because a reclining chair or a reading couch near the bed can quietly become a second breeding site while everyone keeps focusing only on the mattress. If you’ve found signs on a couch, take a closer look at bed bugs in couches before deciding what to do with the furniture.
7. Inspect the Room’s Perimeter
Now step back from the furniture and look at the room itself. Bed bugs will travel along baseboards, especially if there’s any cracking, peeling, or gaps where the trim meets the wall or floor. Get down low with your flashlight and run it along every baseboard in the room, checking for the same signs you learned to spot earlier, fecal spots, shed skins, or live bugs tucked into the gap.
Carpet edges are another spot worth checking, particularly where the carpet meets the wall along the tack strip. If you have loose flooring, floorboard gaps, and cracks around baseboardsthose small crevices can hide bugs too. Electrical outlets and switch plates can also provide protected gaps where bed bugs may hide, particularly in more established infestations. You don’t need to unscrew every outlet in the room, but a quick visual check with your flashlight around the edges of each plate takes seconds and can reveal a lot.
Safety note: Keep this inspection visual around electrical outlets and switches. Don’t insert a card, tool, flashlight, or other object into an electrical opening, and don’t remove electrical covers unless you’re qualified to do so and can work safely.
8. Search Wall Hangings and Fixtures
This is one of the areas homeowners commonly overlook. Once an infestation becomes established, bed bugs can hide beyond the immediate bed area, including behind nearby picture frames, mirrors, wall clocks, and other fixtures. Take down artwork or mirrors hanging near the bed and check the back of the frame along with the wall space directly behind it.
Curtains and drapes deserve a careful look too, particularly along the top hem and any folds in heavier fabric. If you have wallpaper that’s starting to peel at the seams anywhere in the bedroom, check underneath those loose edges as well, since bed bugs will tuck themselves into that gap without hesitation. Light switch covers, smoke detectors, and other fixtures near the sleeping area are worth checking in a more established infestation. It sounds excessive, but this is genuinely where a lot of infestations get missed entirely, because nobody thinks to look three feet above the mattress.
9. Use Bed Bug Interceptor Traps
If your visual inspection doesn’t turn up clear evidence but you’re still concerned about bed bugs, bed bug interceptor traps or monitors can be useful for detecting and monitoring activity around the bed. They sit beneath bed legs and create a pitfall that can catch bugs moving toward or away from the bed.

Another option for monitoring crawling insect activity is a glue trap. These can be useful around furniture and along room edges, but they aren’t a substitute for bed bug interceptors under the bed legs.
Set one under every single leg of the bed, then pull the entire frame away from the wall and make sure no sheets, blankets, or dust ruffles are touching the floor or the wall, since bed bugs will simply use fabric as a bridge to avoid the traps entirely. Check the traps regularly for at least a week or two.
Check the interceptors regularly and photograph anything you find before removing it. A captured bed bug is useful evidence, but try to have a questionable specimen identified if you’re not certain what it is. Conversely, finding nothing in the interceptors doesn’t completely rule out an infestation, particularly with a small or early infestation or when bugs have other routes to the bed. This step is especially useful because it removes the guesswork.
You’re not relying on your eyes catching a two-millimeter egg in dim light, you’re letting the bugs’ own movement give them away.
10. Document and Take Action
If you find evidence at any point during this process, stop and document it properly before you do anything else. Take clear photos of any bugs, eggs, shell casings, or fecal spots you find, right where you found them, before you clean anything up. This matters more than people realize, especially if you rent your home and need to notify a landlord, or if you’re planning to bring in a pest control company and want them to have a clear picture of what you’re dealing with and where.
When photographing a suspected bed bug, take more than one picture if you can: one showing where you found it and another close-up that shows the insect or evidence clearly. If you have a specimen, avoid crushing it before identification. A clear specimen or photograph can prevent a lot of uncertainty later.
Seal anything you physically collected into the plastic bags or containers you set aside in step one. Note down every location where you found evidence, since this map of activity helps a professional figure out how far things have spread and where to focus treatment. If you only found evidence in one or two spots, a fast response now can keep things from spreading into the rest of the house.
That information can help determine how widespread the activity is and will be useful if you decide to have the infestation professionally inspected. Bed bugs can be difficult to eliminate when only the most obvious hiding places are treated, so the goal is to understand the extent of the problem before deciding how to proceed.
Also Read: Can Bed Bugs Make You Sick? Symptoms and Risks Explained
What Not to Do If You Suspect Bed Bugs
When to Call a Professional
You don’t necessarily need professional help just because you found one suspicious mark or insect, but it’s worth getting an inspection if you’ve confirmed a bed bug or found convincing physical evidence and aren’t sure how widespread the problem is.
Professional help is especially useful if you’ve found evidence in multiple rooms, you’re continuing to find new evidence after several days of monitoring, or the bugs are showing up in upholstered furniture or other areas that are difficult to inspect thoroughly. If you live in an apartment, condo, or other multi-unit building, professional guidance can also help determine whether the problem may extend beyond your individual unit.
Don’t wait for the infestation to become severe before asking for help, but don’t panic and start throwing away furniture after finding one suspicious insect either. Confirm what you’re dealing with, document where you found the evidence, and then decide whether a professional inspection is appropriate. A qualified pest control professional can help identify overlooked hiding places and determine how extensive the problem may be before treatment begins.
Final Thoughts
Checking for bed bugs isn’t complicated once you know where to actually look, but it does take patience and a willingness to go past the mattress. Most infestations get missed early on simply because people check one or two obvious spots, don’t find anything conclusive, and assume they’re in the clear. Going through all ten steps, the tools, the tell-tale signs, the mattress, the furniture, the perimeter of the room, and the walls, gives you a genuinely complete picture instead of a partial one.
The earlier you catch an infestation, the easier and cheaper it is to deal with. A small, contained problem in one piece of furniture is a very different job than an infestation that’s spread across three rooms. That’s why knowing how fast bed bugs spread can help you decide how far your inspection should go. If you’ve gone through this checklist and found solid evidence, or you’re still getting unexplained bites and can’t identify the source, don’t keep guessing indefinitely. Bed bugs can persist without treatment, so confirming the problem early gives you a better chance of containing it before it becomes more difficult to manage.