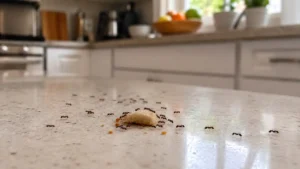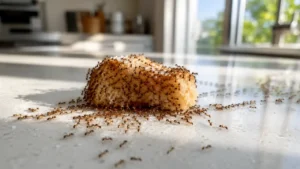
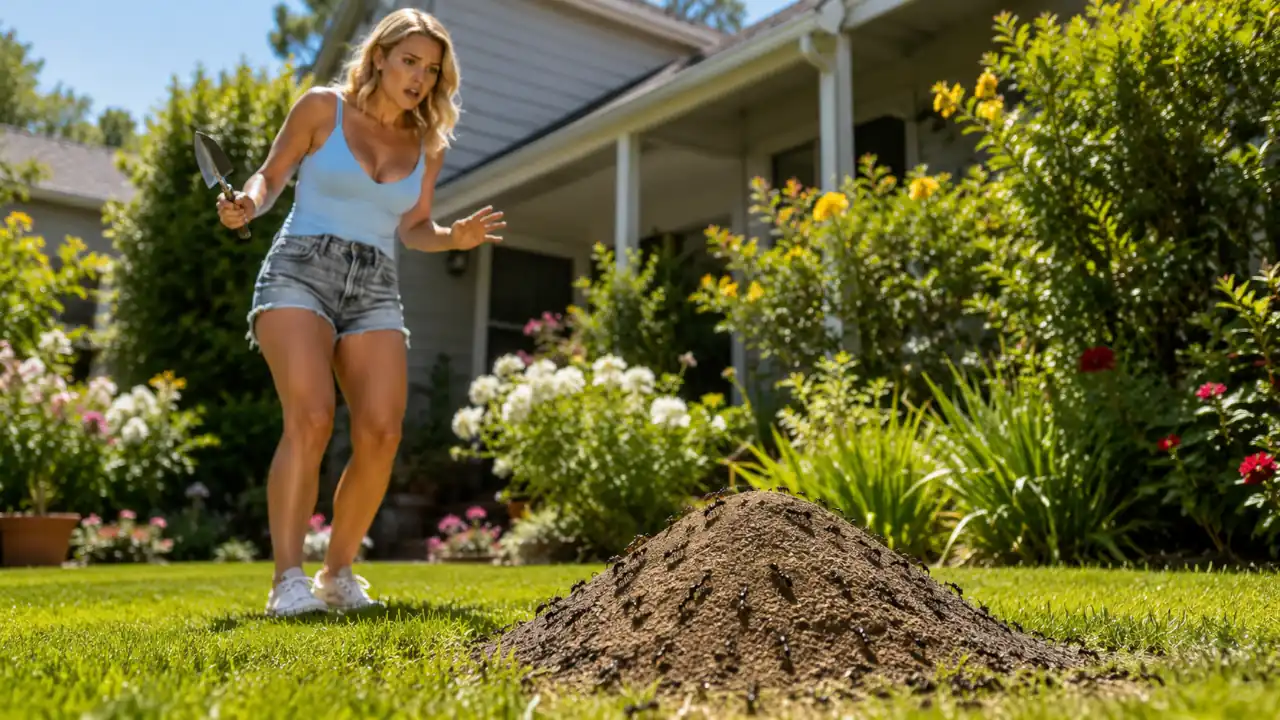
If you have ever stepped out into your yard on a Saturday morning with a cup of coffee only to find three new dirt mounds that were not there the week before, you know exactly how fast ant hills can spread. One mound today turns into a dozen by the end of the month, and before you know it your lawn looks like it has a bad case of chicken pox. I have been dealing with ant colonies in yards for a long time now, and I can tell you the mound itself is never really the problem. It is just the tip of what is going on underground.
In this guide, I am going to walk you through fifteen different ways to deal with ant hills, everything from simple garden hose tricks to the kind of treatment a pro would reach for on a stubborn fire ant colony. Some of these methods are gentle enough for a yard where kids and dogs play all day. Others are stronger and meant for situations where you need the ants gone now. By the end, you will know exactly which approach fits your yard.
Spring and early summer are usually the best times to deal with ant hills because colonies are actively expanding and worker ants are foraging more frequently, making bait treatments especially effective.
Also Read: How To Get Rid of Crazy Ants That Just Won’t Go Away
Quick Answer
The most effective way to get rid of an ant hill is to eliminate the queen and the underground colony, not just flatten the mound. Slow-acting bait products usually provide the best long-term control because worker ants carry them back to the nest, while boiling water and mound drenches offer faster results for individual mounds.
How to Kill an Ant Hill
The most effective way to kill an ant hill is to eliminate the queen and the underground colony rather than simply flattening the mound. Slow-acting ant baits usually provide the best long-term results because worker ants carry the bait back to the nest, while boiling water and liquid mound drenches are better suited for quickly reducing individual ant hills.
If you suspect you’re dealing with fire ants rather than common lawn ants, pay special attention to Methods 8 and 9 because fire ants usually require different treatment strategies for reliable control.
How To Get Rid of Ant Hills
Before choosing a treatment, consider whether you’re dealing with a single nuisance mound or multiple active colonies. The right approach depends as much on the size of the infestation as it does on the type of ant.
1. Flood Them Out with Your Garden Hose
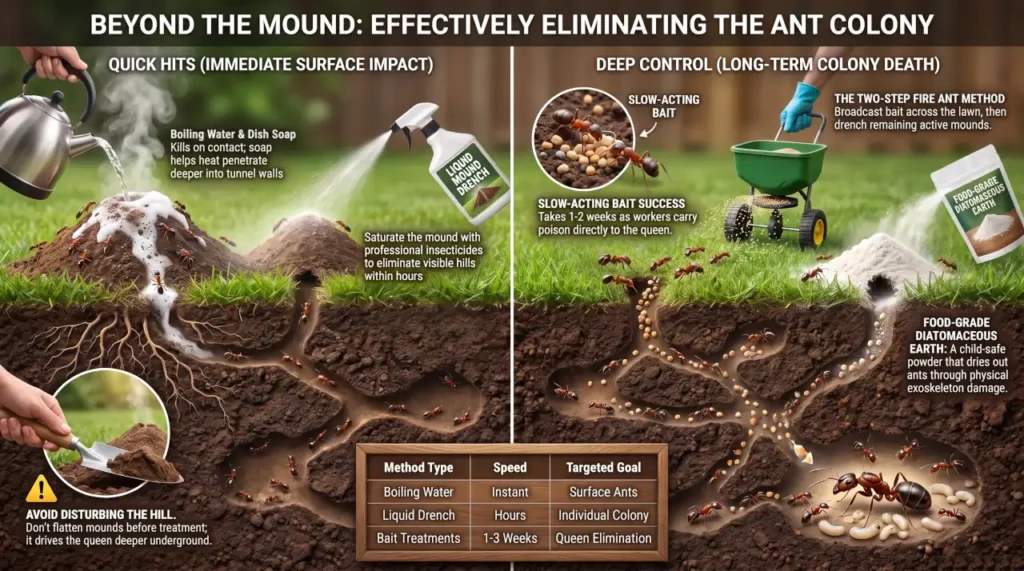
This is usually the first thing people try, and honestly, it is not a bad place to start. Ants build their tunnels to stay dry, and once water starts pouring in, the whole structure becomes unlivable. Grab your garden hose, point it right at the ant mound, and let it run for four or five minutes straight. You want to see standing water pooling around the entrance before you stop.
The idea here is not really to drown every single ant. It is to make the nest so miserable that the colony decides to pack up and relocate somewhere else. That is also the biggest downside of this method. The ants might simply relocate a few feet away and start a new mound. If they relocate, keep an eye on nearby bare patches or mulch beds for a new mound over the next week.
Still, if you do not want to use any chemicals near your kids or pets, this is a safe first move. Toss a squirt of dish soap into the stream while you are at it. It breaks the water’s surface tension so it soaks into the tunnels instead of just running off the top.
2. Pour Boiling Water on the Hill
When flooding alone does not cut it, boiling water kicks things up a notch. This one is old-school pest control that has been passed down for generations, and there is a reason for that. It can reduce smaller colonies, although complete elimination isn’t guaranteed.
Boil a full pot of water, carry it outside carefully, and pour it straight down into the center of the ant mound. Wear closed-toe shoes and pour slowly to reduce the risk of splashing yourself. Large mounds often require multiple applications or several gallons of boiling water before any noticeable reduction occurs. The heat kills on contact and caves in the tunnel walls as it goes.
The catch is that boiling water cools fast once it hits the open air, so it rarely reaches ants that are living six or eight inches underground, which is where the queen usually hides. That means you might knock the colony back without actually finishing the job. It also happens to be lethal to any grass or plants nearby, so keep it away from anything you want to keep alive.
3. Mix Boiling Water with Dish Soap
If plain hot water is not getting the results you want, add dish soap to the mix. Stir about a cup of liquid dish soap into a full pot of boiling water before you head outside. Soap changes the way water behaves. It lets the liquid spread out and travel further into the tunnel network instead of pooling near the entrance, and it makes it much harder for ants to float or swim their way to safety.
This combo tends to outperform plain boiling water because you are hitting the colony with both heat and a substance that can interfere with the waxy coating that helps ants retain moisture and may reduce their ability to survive prolonged contact with water. It is still a one-and-done kind of treatment for whatever the water actually reaches, so a second or third application over a few days is smart if the ants keep showing signs of life. The same warning applies here. Aim carefully, because this mixture is just as rough on your lawn as boiling water alone.
4. Sprinkle Food Grade Diatomaceous Earth
Diatomaceous earth looks like a fine white powder, but under a microscope it is made of the crushed fossilized shells of ancient algae. Those tiny sharp edges cut into an ant’s exoskeleton as it crawls through, which dries the insect out from the inside. It sounds harsh, but it is actually one of the gentler options on this list for households with kids and pets, as long as you buy the food grade version and not the pool filter kind.
Dust it generously over the ant mound itself and along any trails you can see ants using. It will not work instantly. Ants need to walk through it repeatedly before it does its job, so give it several days. The one thing that trips people up is rain. A single good downpour and you are starting over, since wet diatomaceous earth loses its cutting power completely. Wear a mask while you apply it too. It is safe once it settles, but breathing in the dust while spreading it is not great for your lungs.
5. Make a Borax and Sugar Bait
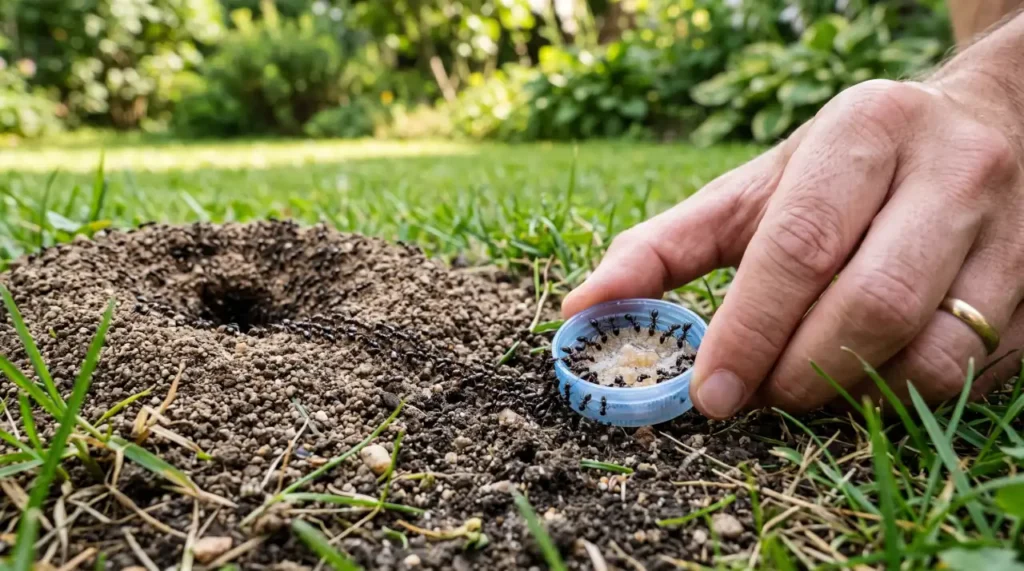
This is my favorite homemade option because it actually reaches the queen, and that is the whole game when it comes to ant hills. In my experience, homeowners often give up on bait too early because they expect immediate results. Resist the urge to disturb the mound while the ants are actively carrying the bait, since interrupting their foraging can slow the process.
Killing worker ants on the surface barely slows a colony down. The queen just keeps laying more eggs. Borax mixed with sugar solves that problem because worker ants carry the sweet bait back to the nest and share it with everyone, queen included.
If you’ve never made homemade bait before, our guide on how to kill ants with borax walks you through the best bait recipes, mixing ratios, and common mistakes to avoid.
Dissolve two cups of sugar and two tablespoons of borax into one cup of warm water, stir until it is fully mixed, and pour small amounts into bottle caps or shallow lids near the mound. Getting the ratio right matters. Too much borax and the ants smell something is off and avoid it entirely. Too little and it will not kill anything. Give this method one to two weeks before judging whether it worked, since the colony needs time to spread it around.
If the ants completely ignore the bait after two or three days, they may already have an easier food source nearby. Cleaning up fallen fruit, pet food, sugary spills, or overflowing trash cans can make the bait much more attractive and improve your chances of eliminating the colony. Keep the bait stations well out of reach of curious pets and toddlers, because borax is not something you want them eating.
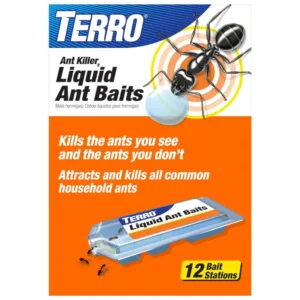
Don’t want to mix your own borax bait? A ready-to-use liquid bait like TERRO works on the same principle by allowing worker ants to carry the bait back to the colony, making it a convenient alternative for many homeowners.
6. Use Store-Bought Granular Ant Baits
If mixing your own bait sounds like too much trial and error, a store-bought granular bait does the same job with a lot less guesswork. Brands like Amdro and Terro have been refined over years to attract a wide range of ant species and carry a slow acting insecticide straight back to the nest.
One thing that often confuses homeowners is that indoor ant baits and outdoor granular ant baits are not always interchangeable. For outdoor ant hills, choose a product specifically labeled for lawn or mound treatment so it is designed to hold up better under outdoor conditions.
Scatter the granules around individual mounds or broadcast them across your whole yard if you are seeing hills pop up in multiple spots. Early morning or evening tends to work best because that is when ants are most actively foraging. Skip application if rain is in the forecast, since water washes the bait away before the ants get a chance to grab it. One solid application can keep protecting your yard for two to three months, which makes this one of the more convenient options if you do not have time to babysit a DIY mixture.
7. Try Professional Strength Insecticide Drench
When you are dealing with a mound that just will not quit, a professional strength drench containing an active ingredient such as bifenthrin, or another insecticide specifically labeled for outdoor ant mound treatment, is the next step up. The exact product matters less than following the label and choosing one intended for the type of ants you are treating. This is the kind of product licensed technicians reach for because it works fast and lasts a long time in the soil.
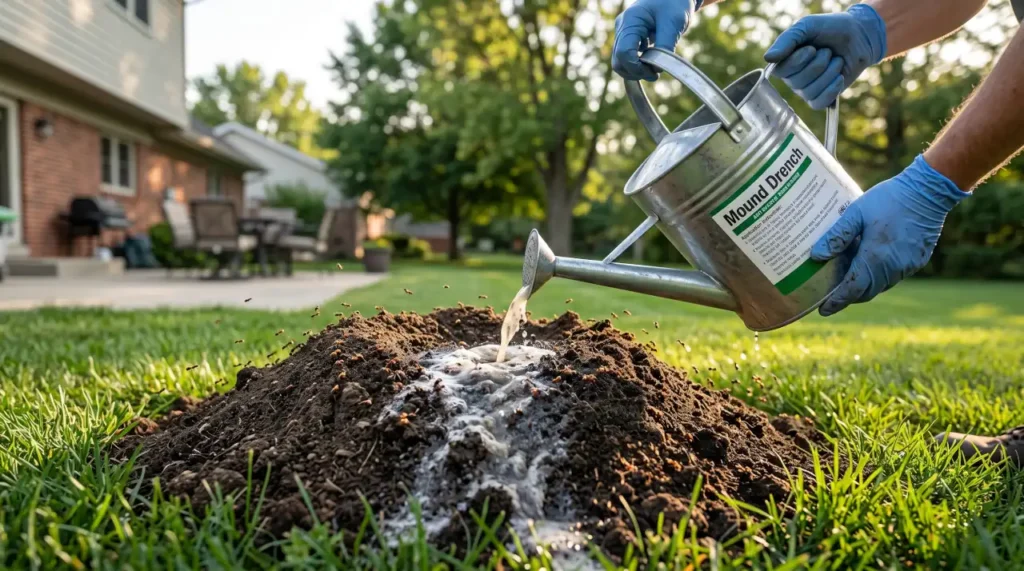
Mix it according to the label, usually around one teaspoon per gallon of water, and pour one to two gallons directly over the mound plus a few feet of the surrounding ground. Early morning or late evening is the best window, since that is when most of the colony is home resting instead of out foraging. This can eliminate many individual ant colonies within hours when applied correctly. Avoid treating during the hottest part of the day because many ants retreat deeper underground, making surface treatments less effective.
Because it is a real chemical treatment, read the label closely and keep everyone, especially kids and pets, off the treated area until it dries completely. Also avoid applying insecticides immediately before heavy rain, as runoff can reduce effectiveness and increase the chance of the product moving into nearby storm drains or waterways.
8. Use Fire Ant Specific Treatments
Regular ant products do not always cut it against fire ants. These guys build deeper, more defensive colonies and they do not hesitate to swarm and sting anything that disturbs their mound. You need something formulated specifically for them.
If you accidentally disturb a fire ant mound, knowing what do fire ant bites look like can help you recognize normal reactions and when medical attention may be needed.
Products built for fire ants, like Ortho’s fire ant killer line, are applied directly over the fire ant mound and the surrounding few feet, then soaked in with a couple of gallons of water to carry the active ingredient down into the nest. Many fire ant treatments begin working quickly, although complete colony elimination usually takes longer depending on the product. Timing matters with fire ants more than with most other species. Apply when it is between 65 and 80 degrees outside, since that is when they are most active near the surface and most likely to come into contact with the treatment.
9. Use the Two-Step Method for Fire Ants
If your yard has more than one or two fire ant mounds, treating each one individually is going to eat up your whole weekend. Entomologists at university extension programs have been recommending a two-step approach for years because it tackles the whole yard at once instead of playing whack-a-mole with individual hills.
Step one is broadcasting a fire ant bait across your entire lawn, not just around visible mounds, since plenty of colonies stay hidden underground without ever building a mound you can see. Step two is going back and hitting any remaining problem mounds with a direct drench or granular treatment.
Mississippi State University Extension recommends the two-step approach of combining a broadcast fire ant bait with individual mound treatments for long-term control, noting that consistent use can reduce fire ant mounds by 80% to 90% in many lawns. Late summer through fall tends to be the sweet spot for the broadcast step, and most experts recommend repeating it once or twice a year to keep the population down for good.
10. Apply Liquid Mound Drench Treatments
Liquid drenches are built for speed. If you have one problem mound that needs to disappear today, this is usually your best bet. Mix the concentrate according to the label, then pour it directly over the center of the ant mound, using enough to fully saturate the mound, typically one to two gallons depending on how big it is.
A lot of people mess this up by using too little liquid. If you do not saturate the whole thing, part of the colony survives and either rebuilds on the spot or relocates a few feet over.
Try not to poke around or disturb the mound before treating it. One mistake I see all the time is homeowners flattening the mound with a shovel or driving a lawn mower over it before applying a treatment. While that makes the mound disappear temporarily, it rarely eliminates the colony because the queen remains protected underground. In many cases, the ants simply rebuild in the same area or relocate a few feet away. Even stepping on the mound or poking it with a shovel can cause some colonies to move the queen deeper into the tunnel system, making complete elimination more difficult.
Ants are surprisingly quick to move the queen deeper if they sense danger coming, and then you are back to square one. The tradeoff with drenches is that they only take care of the hills you can actually see, so smaller or newer colonies nearby might still need separate treatment.
A successful treatment usually results in little or no ant activity around the mound within several days, and you shouldn’t see fresh loose soil appearing around the entrance. Continued activity often means the queen survived or another nearby colony has moved into the area.
11. Apply Insecticide Dust to Ant Hills
Dust treatments are handy for mounds tucked into spots where pouring liquid is not practical, like along a foundation, inside sidewalk cracks, or squeezed between two patio stones. Ants track the dust on their bodies as they move through it and carry it back into the colony, spreading it to nestmates along the way.
Just sprinkle it directly onto the mound and the entry points you can find. No mixing, no water needed, and it keeps working for weeks after you apply it. The one thing to watch for is wind. Dust particles travel easily on a breezy day, so pick a calm afternoon and try not to let it drift toward garden beds or anywhere water runoff could carry it. Some dust products, especially anything with acephate, have a strong odor that lingers for a while, so this is not always the best pick right next to a patio or deck you use often.
12. Try Coffee Grounds as a Natural Deterrent
This one gets passed around a lot in gardening circles. Used coffee grounds are often recommended as a natural ant deterrent because their strong smell may temporarily disrupt ant trails. While some homeowners report short-term success, there is very little research showing that coffee grounds eliminate established outdoor colonies.
If you’re considering this remedy, you may also want to read Do coffee grounds repel ants?, where we separate common myths from what homeowners actually experience.
Scatter fresh grounds directly on top of mounds and along the paths ants seem to be using most. It will not kill anything, so think of this as more of a nudge than a knockout punch. Ants are also stubbornly resourceful, and they will often just relocate the grounds out of their path or find a workaround within a day or two. I have tried this in yards where the infestation was mild, and it can buy you some breathing room, but I would not lean on coffee grounds alone if the colony is already established and spreading.
13. Create Barriers with Cinnamon and Spices
Ants navigate almost entirely by scent trails, and strong spices like cinnamon, cayenne pepper, and black pepper mess with their ability to follow those trails. Dust a heavy line of ground cinnamon or cayenne around the base of a mound, along entry points into your home, or across any path where you keep seeing ant traffic.
This is about as safe as pest control gets. It will not harm kids, pets, or your grass, and you probably already have some of these spices in your kitchen cabinet. The downside is that it repels rather than eliminates, so an established colony is not going anywhere just because of some pepper. Pair it with a bait method like borax and sugar if you want spices to actually contribute to solving the problem instead of just masking it.
In my own experience, spices work best as a temporary barrier rather than a true treatment. I use them to discourage ants from crossing a certain area while a bait works on eliminating the colony underneath.
14. Use Essential Oils to Disrupt Ant Colonies
Strong smelling oils like peppermint, tea tree, and cinnamon leaf work on the same principle as spices, but in liquid form, which makes them easier to spray in a wider area. Mix about five drops of tea tree or peppermint oil into a cup of water in a spray bottle and coat the mound and surrounding trails.
Peppermint oil is also a popular home remedy for other pests. If you’re curious about its effectiveness beyond ants, see our guide on does peppermint oil repel spiders.
Laboratory studies have shown that some essential oils, including cinnamon-based oils, can affect certain ant species under controlled conditions. Outdoors, however, sunlight, rain, and wind reduce their effectiveness quickly, so they work better as short-term repellents than complete colony eliminators. The tradeoff is that the scent fades within a day or two outdoors, especially in sun and wind, so you will be reapplying often if you want it to keep working. If you have cats or dogs, double check with your vet before spraying certain oils around the yard, since some essential oils are not safe for pets.
15. Spread Cornmeal Around Ant Hills
Cornmeal is one of those remedies that sounds almost too simple to work, but plenty of homeowners swear by it. The idea behind this remedy is that worker ants may carry the cornmeal back to the colony, but there is little scientific evidence that cornmeal actually kills ants. Some homeowners report fewer ants after using it, while others see no noticeable change. Think of it as a low-risk experiment rather than a proven control method.
Cornmeal isn’t the only pantry remedy people try. Many homeowners also wonder does baking soda kill ants, but it has similar limitations depending on how it’s used.
Spread it generously around the mound and any nearby trails. Worker ants will either eat it on the spot or haul it back to share with the rest of the colony, which at least gives it a chance to reach ants you cannot see. It is completely safe for kids and pets, which makes it an easy one to try while you decide whether you need something stronger. If you decide to try it, give it a couple of weeks before deciding whether it has made any difference. If the colony is still active after that, you’re usually better off switching to a proven bait or mound treatment.
Common Mistakes That Keep Ant Hills Coming Back
Over the years, I have seen homeowners make the same few mistakes over and over again. Most ant problems are not caused by choosing the wrong product. They happen because the treatment is used the wrong way.
Also Read: How To Get Rid Of Sugar Ants Before They Spread
How to Prevent New Ant Hills
Even after you’ve eliminated an active colony, the conditions that attracted ants in the first place may still be there. Keeping your lawn healthy, reducing excess moisture, cleaning up fallen fruit, storing pet food indoors, and trimming vegetation away from your home’s foundation all make your yard less attractive to future colonies. Reducing these food and moisture sources also helps address what attracts ants to your house in the first place. Checking your lawn regularly during warm weather also makes it easier to catch new mounds before they become established.
Final Thoughts
Getting rid of ant hills really comes down to matching the method to how bad your situation actually is. A single small mound in the corner of your yard might disappear after a good flooding or a round of boiling water. A yard full of aggressive fire ant colonies is going to need the two-step method or a professional strength drench to make any real dent. Whatever you choose, remember that the mound is never the actual target. The colony living underneath it is, and specifically the queen keeping that colony alive. Any method that only disturbs the surface is going to give you a short break at best.
One thing I always tell homeowners is to identify the type of ant before choosing a treatment. Fire ants, pavement ants, carpenter ants, and other common species don’t always respond the same way to baits or mound treatments. If you’re unsure which species you’re dealing with, watch how the ants behave. Fire ants aggressively swarm and sting when their mound is disturbed, while many other common lawn ants are much less defensive. Correct identification helps you choose the most effective treatment. Matching the treatment to the species usually saves both time and frustration.
Once you believe the colony is gone, level the old mound and keep an eye on that area for the next couple of weeks. If fresh soil starts appearing again, it usually means the original colony survived or another nearby colony has moved into the same favorable location.
If you have tried several of these approaches and the mounds keep coming back bigger than before, that is usually a sign the colony has spread further than what a homeowner can reasonably tackle alone. At that point it makes sense to bring in a pest control professional who can identify the exact species you are dealing with and treat the whole colony network, not just the hills you can see from your back porch. If you’re wondering what professional treatment involves, our guide explains what an ant exterminator does and why professionals often take a different approach than typical DIY treatments.